Configure SOS contacts
Choose whether SOS is shown, set an ordered list of personal contacts and decide whether continuation is manual or automatic.
Safety boundary: SOS makes ordinary telephone calls to configured personal contacts. It does not guarantee a connection, answer or emergency response. Never use an emergency-service number while learning the feature.
Set up the SOS sequence
- Ask each intended contact for consent. Explain their place in the calling order and when the phone user may call.
- Choose contacts in Guided Setup or the Contacts assignment controls. Put trusted people in the order they should be tried.
- Enable the SOS Button only when it suits the phone user. A normal tap gives a hint; a deliberate long press starts the flow.
- Review call confirmation and continuation. Manual SOS offers CALL NEXT and STOP. Missing contacts are skipped, and sequence state survives returning from a call.
- Conduct a planned dry run. Use consenting non-emergency contacts, stop the sequence and confirm the phone user understands the long press.
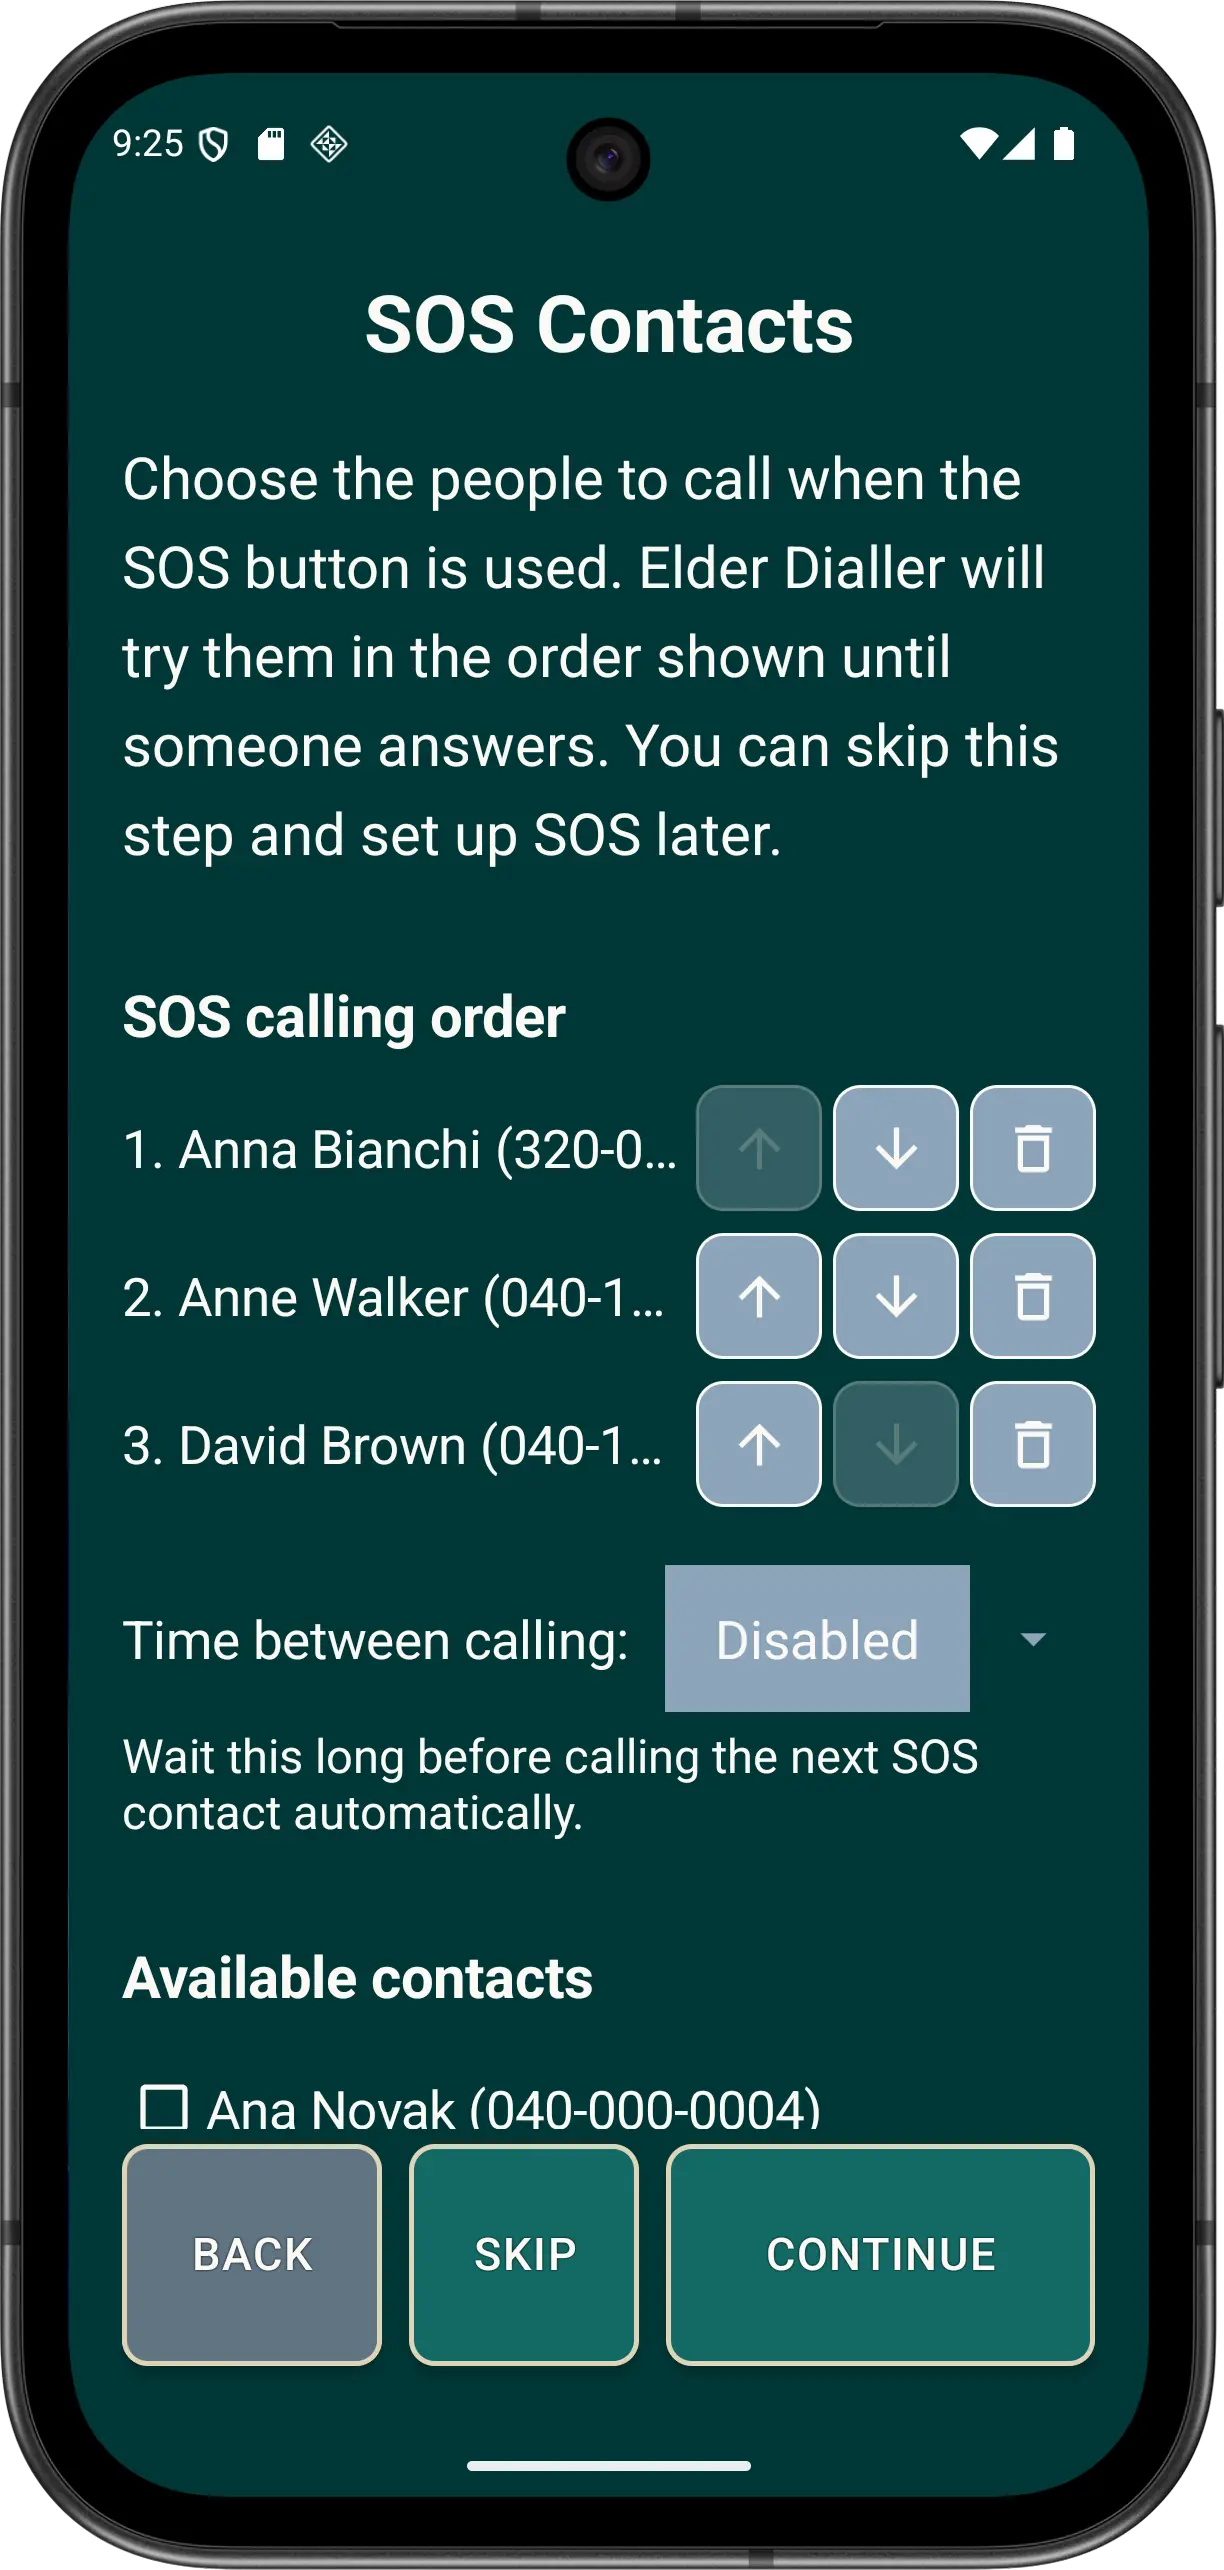
Optional Advanced Auto SOS
Auto SOS can be Disabled or set to 10, 15, 20, 30 or 45 seconds. When enabled, it can force loudspeaker, end the current SOS call after the selected timeout and continue or cycle through the ordered list until STOP is chosen.
Disclaimer: All names, contact details, and images displayed on this website and shown within the Elder Dialler application are entirely fictitious and are used for demonstration and illustrative purposes only. Any resemblance to real persons, living or deceased, is purely coincidental. No content is intended to represent, simulate, or replicate any actual individual.